NFT Mint Page in Minutes: The Simple Solution You Need
Create, Host, and Sell NFTs with Ease: A Revolutionary ReactJS-based Platform with third-web Integration


Table of contents
- Introduction
- Prerequisites for Building and Hosting NFT Mint page
- Key Requirements for Building and Hosting a ReactJS Project
- Deploying Your NFT Contract on the Blockchain
- Ensuring Secure and Fair Distribution of NFTs
- Step-by-Step Guide to Install an NFT Minting Website: Everything You Need to Know
- Lightning Fast Hosting
- Conclusion
- Important Links
Introduction
I am excited to introduce my latest project, which is a ReactJS-based NFT minting platform with integration of the third-web library. This innovative platform allows users to connect their wallets and easily host the NFT mint website without the need for programming knowledge. What’s more, it can be hosted within minutes, providing a hassle-free and convenient solution for NFT creators and collectors.
The third-web library provides a secure and straightforward way for users to manage their wallets and blockchain contracts. Additionally, the platform’s user-friendly interface makes it simple for anyone to get started with NFT contracts. With the flexibility and customizability of ReactJS, this platform can be tailored to meet the unique needs of your project or business.
Whether you’re an artist hoping to sell your digital creations as NFTs or a developer looking to expand your portfolio, this platform has all the necessary features and tools. It is a powerful solution that enables you to get started with NFTs quickly and effortlessly. So, if you’re ready to take the plunge into the exciting world of NFTs, this platform is an excellent option to consider.
Prerequisites for Building and Hosting NFT Mint page
Understanding of Blockchain Technology: To work on a blockchain-based project, it’s important to have a good understanding of the underlying technology. You should know the basics of how blockchain works, what a wallet is, and how transactions are made.
Access to a Blockchain Wallet: Since the project involves a blockchain wallet, you should have a working wallet that is compatible with the blockchain network being used. This can include wallets like MetaMask, Coinbase Wallet, or any other wallet that supports the blockchain being used.
Key Requirements for Building and Hosting a ReactJS Project
Node.js and npm CLI are installed on your local machine to manage packages and dependencies for your project.
Vercel CLI is installed on your local machine to deploy the project to a hosting service (Installing npm is a prerequisite for installing Vercel).
In addition to the prerequisites mentioned above, working with blockchain and React projects also requires familiarity with testnets.
Deploying Your NFT Contract on the Blockchain
A Step-by-Step Guide to Launching Your Own Crypto Collectibles
Deploying an NFT drop in Thirdweb is a straightforward process that requires only a few steps. Here’s a step-by-step guide to help you get started:
First, make sure you have a Thirdweb account and have connected your wallet to the platform. If you haven’t already, you can create an account by visiting the Thirdweb website and following the sign-up process.
After you’ve created your account and connected your wallet, go to the NFT drop creation page on ThirdWeb and click on “NFT Drop” and then “Deploy Now.” This page should contain a form for you to fill out with the necessary information for your NFT drop.
Once you’ve filled out the form and uploaded your NFT image, review the information to make sure everything is correct. Then, select the appropriate network according to your needs. For testing, use the “Goerli Testnet”, Before deploying in the “Goerli Testnet” you need to get some faucets to make transactions (click here to get faucets). and then click the “Deploy Now” button to deploy your NFT drop on the blockchain.
Finally, you’ll need to confirm the transaction in your connected wallet. This will complete the deployment of your NFT drop on the blockchain.
Next, you’ll need to upload the files for your NFTs. This can include images, videos, or any other digital assets you want to include with your NFTs. Make sure your files meet the size and format requirements provided by Thirdweb. To begin, Thirdweb offers both single and bulk upload options.
Single NFT upload refers to the process of creating and uploading one NFT at a time. This can be a time-consuming process if you have many NFTs to upload, but it allows for a more personalized approach to each NFT, ensuring that each item is carefully curated and presented to potential buyers.
Bulk upload of NFTs is a convenient feature with which a seller can add multiple items to their collection at once. To do a bulk upload, sellers need to have a set of digital files ready, such as images or videos. They can then use a tool provided by the HashLips to generate NFTs, set metadata for each NFT, and specify details such as royalty splits. Some platforms also provide templates or pre-configured settings to speed up the process. Metadata includes information such as the name, description, and other details about the NFT. It’s important to ensure that each NFT is properly curated and presented to potential buyers.
That’s it! You’ve Successfully deployed an NFT drop on Thirdweb. From here, you can promote your drop and start selling your NFTs to collectors around the world. With Thirdweb’s secure and user-friendly platform, you can be confident that your NFTs are in good hands.
Note: When deploying your NFT contract on the Ethereum blockchain using the Thirdweb dashboard, it’s important to select the appropriate testnet or mainnet. Choosing the wrong network can result in delays or even the loss of your NFTs or other assets. Be sure to check that you have selected the correct network before proceeding with the deployment process.
Ensuring Secure and Fair Distribution of NFTs
How to Create a Claim Phase on Thirdweb
In addition to deploying an NFT drop on Thirdweb, you can also create a claim phase. A claim phase is a set of conditions that define when and how your users can mint your tokens.
For each claim phase, you can define:
When the claim phase will start
How many tokens do you want to drop
How much do you want to charge per token
What currency do you want to charge in
Which wallet addresses are allowed to claim tokens (allowlist)
How many tokens can be claimed per transaction
How many seconds do wallets have to wait between claims
Here’s a step-by-step guide to help you set up a claim phase:
Firstly, visit the NFT drop creation page on Thirdweb and click on the “Advanced Settings” option. This will enable you to customize the settings for your NFT drop, including the claim phase.
In the advanced settings, you’ll find the option to enable the claim phase. Once you’ve enabled the claim phase, you’ll need to set the duration for the phase.
The duration of the claim phase determines the time that collectors have to claim their purchased NFTs. You can set the duration in hours, days, or weeks, depending on your preferences.
Once you’ve set the duration for the claim phase, save your settings and deploy your NFT drop on the blockchain as explained in the previous steps.
After your NFT drop has been deployed, the claim phase will begin based on the duration you set. During this phase, collectors can claim their purchased NFTs by visiting your NFT drop page on Thirdweb and following the claim process.
As the NFT creator, you should monitor the claim phase to ensure that all purchased NFTs are claimed by their respective owners. Any unclaimed NFTs will be returned to your wallet once the claim phase has ended.
By setting up a claim phase for your NFT drop on Thirdweb, you can ensure that collectors have enough time to claim their NFTs and that your NFTs are distributed securely and fairly.
How to Copy NFT Drop Contract Addresses on Thirdweb
Log in to your Thirdweb account and navigate to the dashboard.
Click on the NFT drop whose contract address you want to copy to open its details.
The contract address will be listed under the “Contract Address” section on the NFT drop details page. To copy it, click on the copy icon located next to the address.
The contract address, which is necessary for hosting the minting website, will now be copied to your clipboard.
Step-by-Step Guide to Install an NFT Minting Website: Everything You Need to Know
Quick Guide to Launching a ReactJS Website from GitHub
First, you’ll need to have Git installed on your computer. If you don’t have it already, you can download it from the Git website.
Open your terminal/command prompt and navigate to the directory where you want to clone the repository.
Once you’re in the correct directory, run the following command to clone the repository:
git clone https://github.com/ritik-prog/nft-mint-website.git
5. Once the repository has finished cloning, navigate into the project directory using the following command:
cd nft-mint-website
6. Next, you’ll need to install the project’s dependencies. Run the following command to install them:
npm install
7. Finally, you can start the ReactJS website by running the following command:
npm start
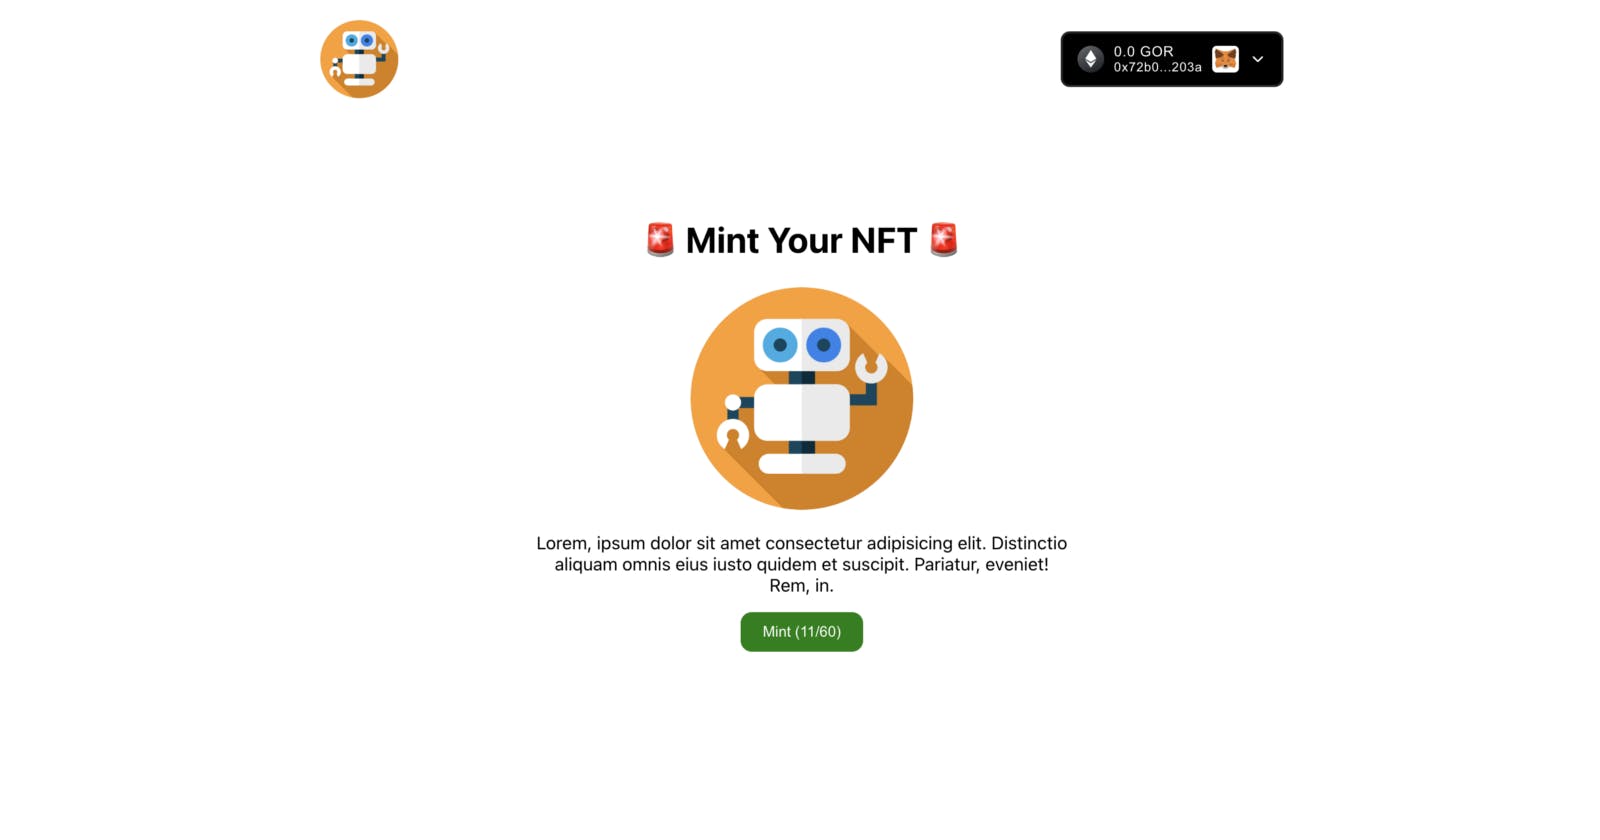
This will launch the website in your default web browser. If the website doesn’t automatically open, you can navigate to it by typing localhost:3000 in your web browser's address bar.
That’s it! You’ve successfully cloned and launched a ReactJS website from GitHub. From here, you can make changes to the code and customize the website. Let’s now link the third-web contract and website.
Configure Website Data File For Your Contract
1. Open “./source/data.json” in the project directory.
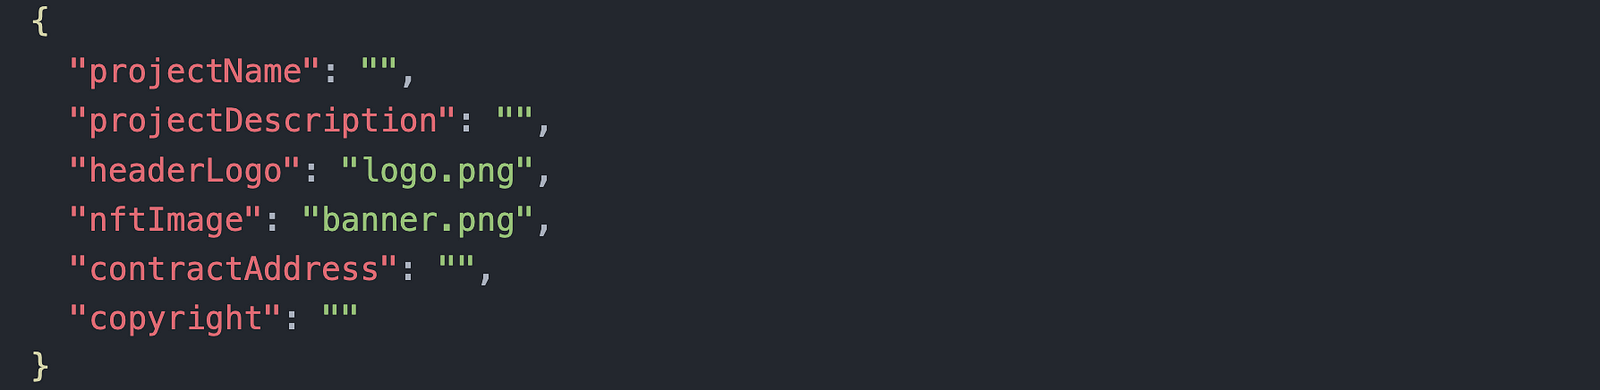
2. Edit all required fields apart from “headerLogo” and “nftImage”
Note:- Remember to update the contract’s address.
3. Update “headerLogo” and “nftImage”
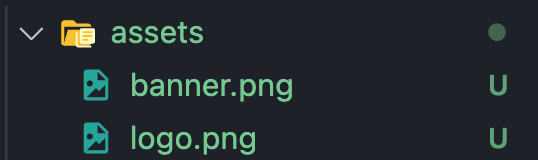
Update “headerLogo” and “nftImage”
Note: Change these pictures in “./src/assets/” and keep the same name, and if you are changing the names of files then don’t forget to update the “data.json” file.
4. Change the blockchain network to the desired network
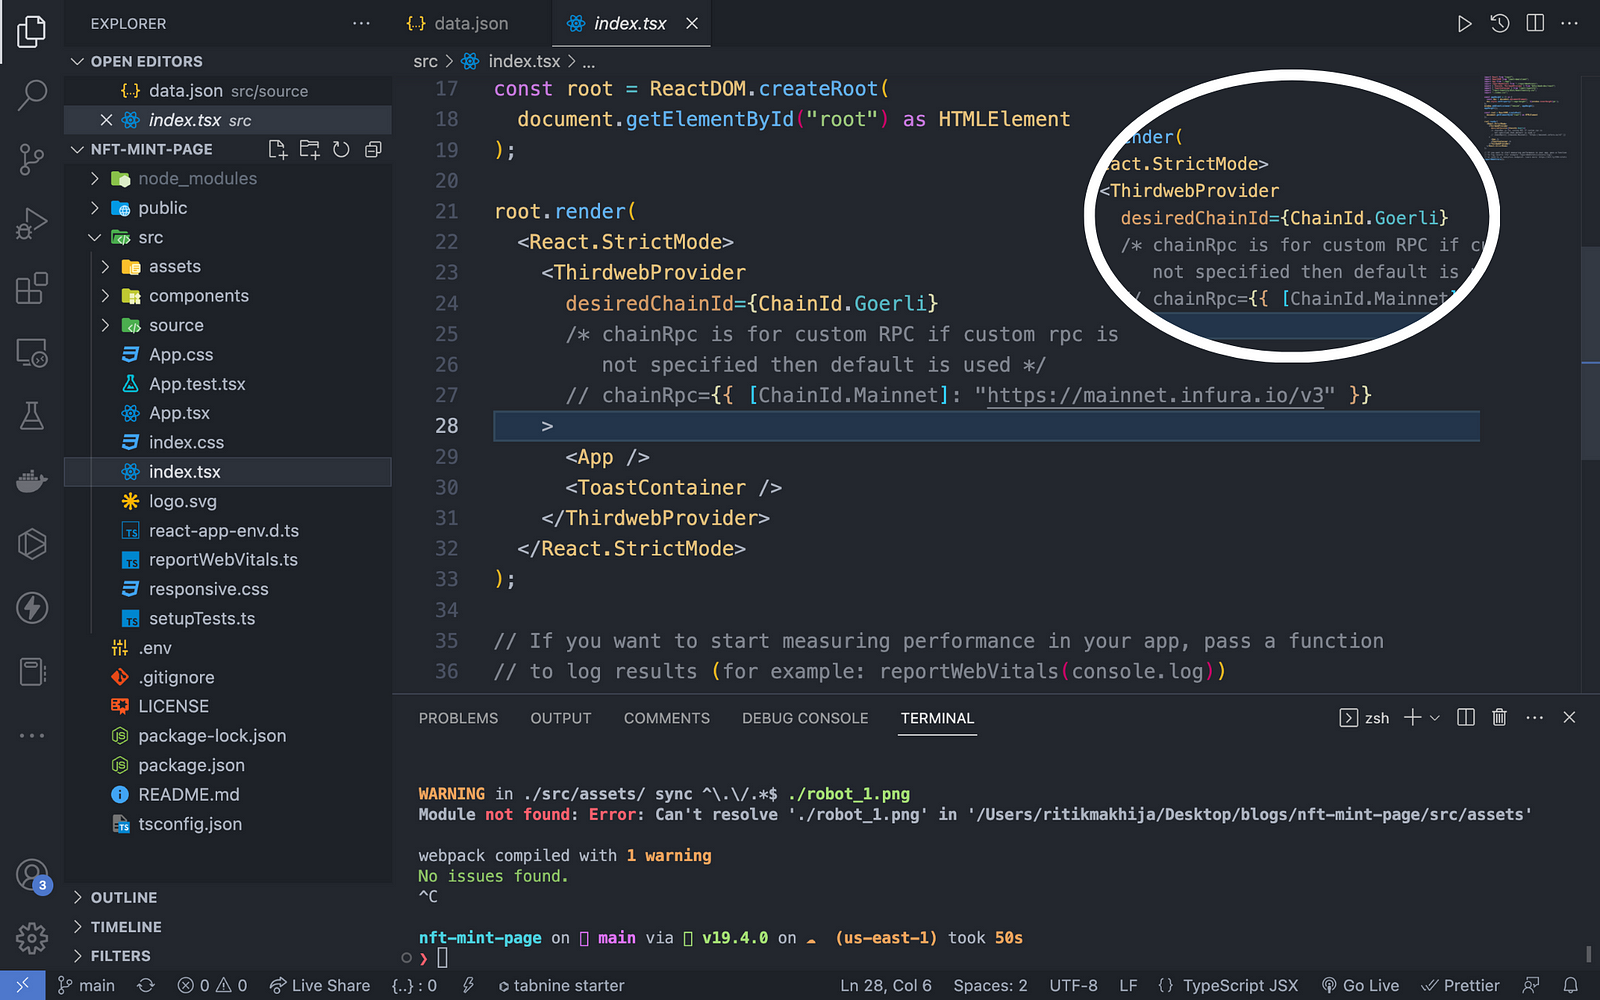
CHANGE BLOCKCHAIN NETWORK
Note:- For Ethereum mainnet, change “ChainId.Goerli” to “ChainId.Mainnet.” inside “./src/index.tsx”
5. Visit if you want to see changes.
localhost:3000
Lightning Fast Hosting
A Step-by-Step Guide to Installing and Using Vercel CLI
To install Vercel on your machine, follow these steps:
Open a command prompt or terminal on your machine.
Type the following command to install Vercel CLI:
npm i -g vercel
3. Once the installation is complete, you can verify the installation by typing the following command:
vercel -v
Step-by-Step Guide: Hosting Website With Vercel CLI
1. Create a Vercel account by going to the Vercel website and clicking the “Sign Up” button. Follow the instructions to create your account.
2. Log in to your Vercel account from the command line by typing:
vercel login
3. Follow the prompts to log in using your Vercel credentials.
4. Change to your React project directory in the command line.
cd nft-mint-website
5. Initialize your project by typing:
vercel init
6. Follow the prompts to configure your project settings. This will include choosing your project name, deployment region, and other settings.
7. Once your project is initialized, use the vercel deploy command to deploy your project:
vercel deploy
8. Follow the prompts to finalize your deployment settings. You can choose whether to deploy your project as a development or production build and choose other options like setting environment variables or deploying with a custom domain.
9. Once the deployment is complete, you can access your website using the provided URL like https://nft-mint-page-nu.vercel.app/.
That’s it! With these steps, you should be able to easily log in to Vercel and deploy your React website using the Vercel CLI.
Conclusion
Streamlining NFT Minting: A Simple Solution for Anyone
In conclusion, creating a blockchain contract with the ThirdWeb library and linking it with a custom ReactJS website is a powerful tool for creating secure and decentralized applications. By following the steps outlined in this project blog, you have learned how to build a blockchain contract, integrate it with a website, and host it on Vercel.
But the journey doesn’t end here. As with any project, there may be challenges and obstacles along the way. Therefore, it’s essential to seek support and help from the community, share your experiences, and spread the knowledge to others who may be interested.
Therefore, I encourage you to seek out communities that are interested in NFTs, share your minting page, and ask for feedback and support. Whether it’s through social media, online forums, or other channels, there are plenty of ways to connect with others who share your passion for NFTs.
By doing so, you can help promote the use of blockchain technology and inspire others to create their own decentralized applications. So, don’t hesitate to ask for support and share your project blog with others. Together, we can continue to innovate and explore the possibilities of blockchain technology.