
Turbocharge Your CI/CD Pipeline: Set Up Jenkins Quickly and Easily on AWS
Streamline Your Software Delivery with Rapid Jenkins Installation and Configuration Technique on Amazon Web Services (AWS)


Introduction
Pipelines for Continuous Integration and Continuous Delivery (CI/CD) are an essential part of software development. Jenkins is a popular tool for developing, testing, and deploying code with Amazon Web Services (AWS). Creating a Jenkins environment is now easier than ever. In this blog, we will walk you through the process of setting up Jenkins on AWS, including pro tips to get it done quickly.
Prerequisites
Before we begin, please ensure that you have an AWS account and a basic understanding of AWS services such as EC2 instances and security groups. Also, make sure an EC2 instance is running and has an appropriate IAM role assigned to it.
Effortless Jenkins Setup on AWS: A Comprehensive Step-by-Step Guide
Launch an EC2 instance
The first step is to launch an EC2 instance. To do this, log in to your AWS account and navigate to the EC2 dashboard. Choose an Amazon Machine Image (AMI) that supports Jenkins such as Amazon Linux 2 or Ubuntu. Select the instance type based on your requirements and launch the instance.
Note: If you're not familiar with launching EC2 instances, the best way to learn is to refer to the official AWS documentation (click here).
Configure Security Groups
By default, Jenkins listens on port 8080. To access Jenkins from a web browser, you need to configure the security group of the EC2 instance. Create an inbound rule to allow traffic from your IP address or a specific CIDR range on port 8080.
Note: Similarly, if you are not familiar with opening ports in security groups, please refer to the official AWS documentation (click here) for guidance.
Connect to EC2 instance and install git
To proceed with the Jenkins setup, connect to the EC2 instance and ensure that Git is installed on it. You can do this by connecting to the instance via SSH and then installing Git using the appropriate commands.
Ubuntu:
sudo apt install gitAmazon Linux 2:
sudo yum install git-allNote: The installation command for Git can vary depending on the Linux distribution. Therefore, it's recommended to search for the appropriate command based on your specific Linux machine and then install Git.
Installing Jenkins on AWS: A Comprehensive Guide
Once the EC2 instance is up and running, SSH into the instance using an SSH client like Putty or the terminal on your local machine. Install Jenkins using the following commands:
Installing using yum
Clone Git Repository
git clone https://github.com/ritik-prog/install-jenkins-quickscript-yum.gitChange Directory
cd install-jenkins-quickscriptRun Bash Script
bash bash.sh
Installing using apt
Clone Git Repository
git clone https://github.com/ritik-prog/install-jenkins-quickscript-apt.gitChange Directory
cd install-jenkins-quickscriptRun Bash Script
bash bash.sh
Access Jenkins
Once you have configured the security group, open a web browser and navigate to http://<EC2 Public IP>:8080. You should see the Jenkins login page. Follow the instructions to complete the setup wizard and create your first Jenkins job.

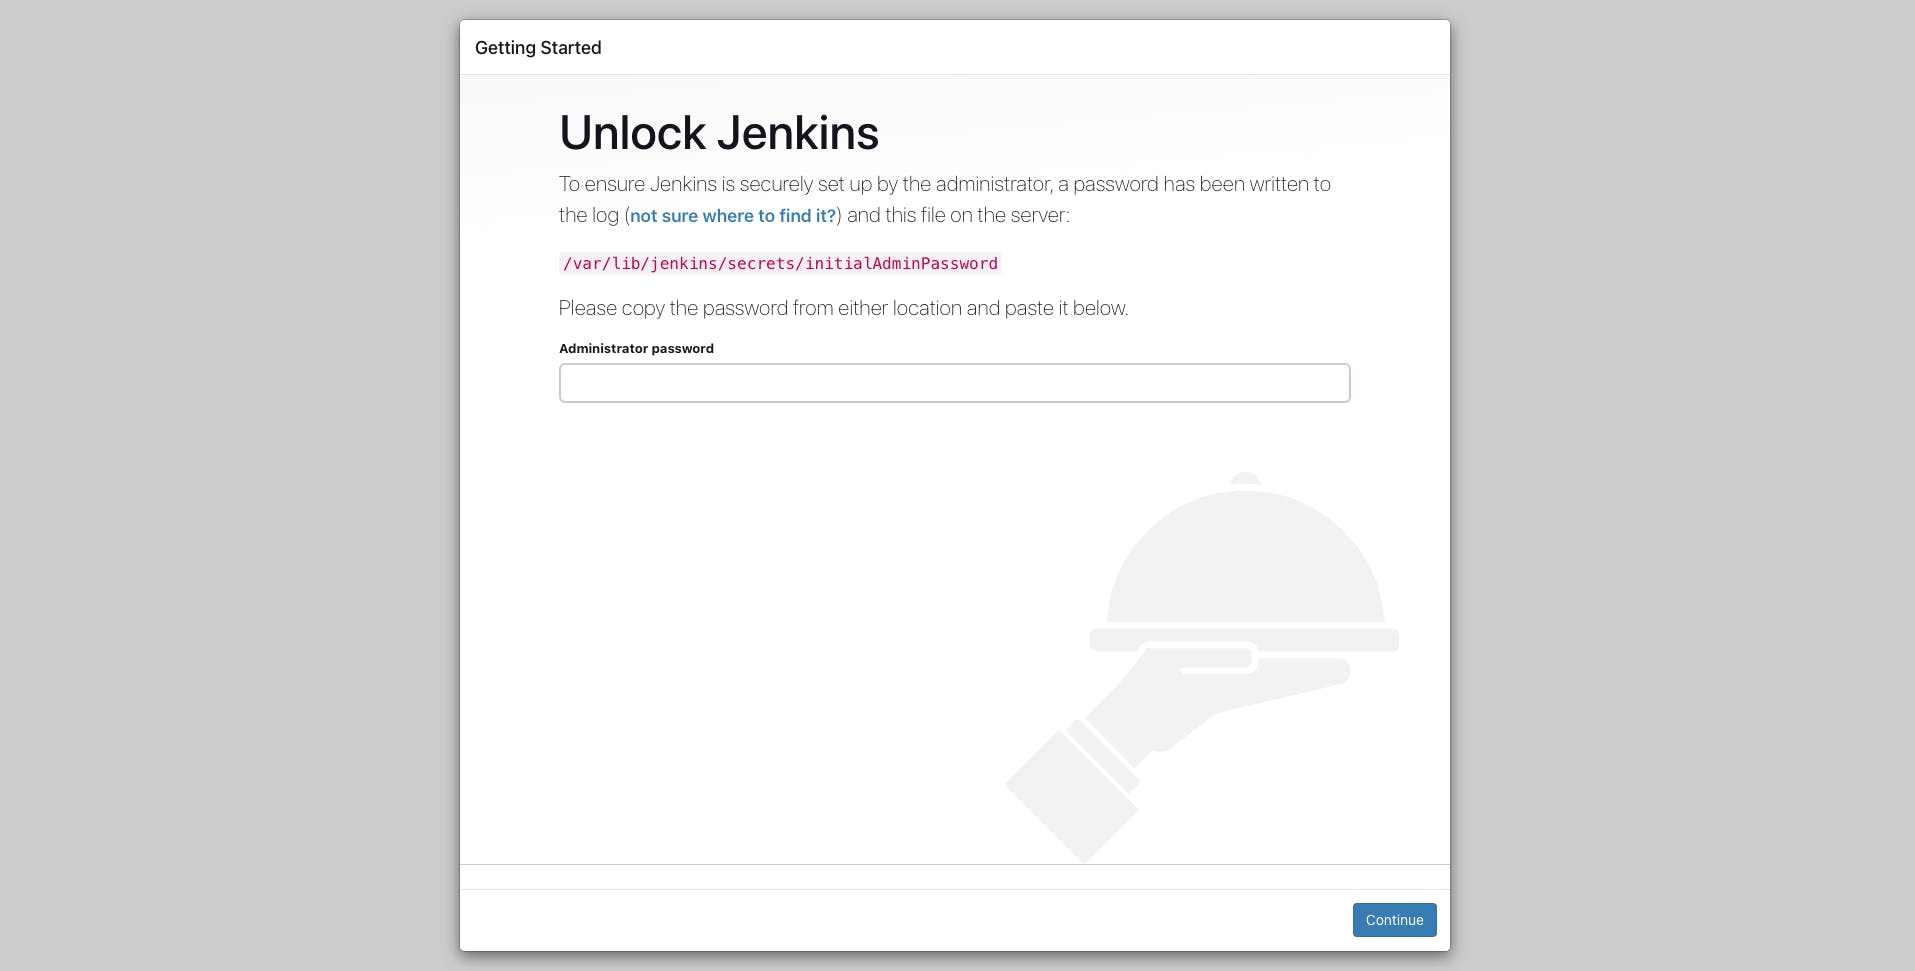
Locate the Initial Admin Password
To find the initial admin password, you'll need to SSH into your EC2 instance and run the following command:
sudo cat /var/lib/jenkins/secrets/initialAdminPasswordNote: The path for the initial admin password can vary depending on the system. To find the correct path, please refer to the instructions in the "Read Me" box on the "Unlock Jenkins" page.

Enter the Initial Admin Password
Paste the initial admin password into the "Administrator password" field on the "Unlock Jenkins" page, and click "Continue." This will unlock Jenkins and take you to the "Customize Jenkins" page, where you can configure additional settings and plugins.
Congratulations! You've successfully unlocked Jenkins on your AWS instance and are now ready to start using it for your CI/CD pipeline. With Jenkins, you can automate your software delivery process and ensure that your applications are built, tested, and deployed with ease.
Conclusion
While setting up Jenkins on AWS may seem challenging, with the right guidance, you can establish your CI/CD pipeline quickly. Leveraging AWS EC2 instances and security groups enables you to create a secure, reliable, and scalable Jenkins server.
By automating your software delivery pipeline with Jenkins, you can deliver high-quality software faster and more reliably. Incorporating best practices, such as automated testing and continuous integration, ensures your code is always ready for production and your customers receive an exceptional experience.
Don't wait any longer to turbocharge your CI/CD pipeline on AWS. Set up Jenkins today and face even the most complex software delivery challenges with ease.